Editing Workflow |
OverviewCycle has a scientific approach to sound design. By giving you the tools to operate directly on the fundamental aspects of a sound and the realtime visualization of sound's characteristics, you avoid tedious trial and error in the search of a particular tone. The point-and-line workflow is quite distinct from other synthesizers and is more akin to CAD or 3D design applications. Really, the toolset is quite small and still does a heck of a lot! |
||||||||||||||||||||||||||||||||||||||||||||||||||||||||
Tools |
||||||||||||||||||||||||||||||||||||||||||||||||||||||||
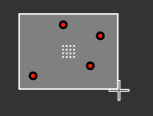
 Selector This is the default tool. The selector is able to add vertices/vertex cubes to a curve,
select vertices individually, box select a group of vertices, and do common transformations
on the selected.
SelectionSingle vertex selection is done by right-clicking close to a curve node. To add or remove a single vertex to the current selection, hold shift and right click near the area of interest. There's no need to first select a single vertex to drag it. You'd only want to select a single vertex to make a group of vertices to drag. Box selection is done by holding shift and left-dragging with the
mouse over the area of interest. Box-selecting again will add to the
total selection.
You can remove vertices from the selection by holding cmd while box-selecting.
To deselect all vertices, hit the a key.
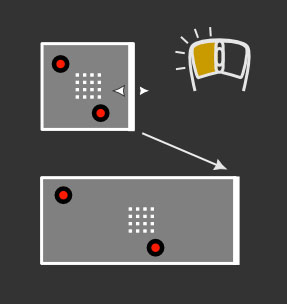
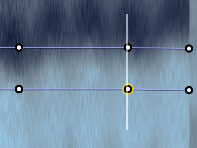
Moving VerticesDrag a vertex by right-clicking near it and holding the button while you move the mouse. The vertex highlighted with a yellow outline is the one closest to the cursor and the one that will be moved when you drag. To move a group of vertices that have been box-selected, left-drag on the enclosing rectangle.
Vertex CreationCreate a vertex/curve-node by left-clicking in the editing area. In editors where curves
can morph, adding a vertex creates a vertex cube (set of 8 vertex states) behind the scenes,
initializing each of the 8 states to the position you added the vertex at.
Swapping Mouse buttonsIf you want, you can switch the functions of the left and right mouse buttons from the menu bar Edit > Switch Mouse Buttons. |
||||||||||||||||||||||||||||||||||||||||||||||||||||||||
 PencilThe pencil tool draws freehand paths. It has two modes: the first adds vertices by left-dragging. The second mode snaps existing nodes to the path by right-dragging. The pencil tool is only applicable in 2D editing panels. The amount of mouse smoothing to the freehand tool can be adjusted with the mouse scroll wheel. |
||||||||||||||||||||||||||||||||||||||||||||||||||||||||
 AxeThe axe tool is used to chop vertex paths into smaller segments. In effect, a more complex vertex path is created, and each segment can transform over the 3 morphing ranges. The size of the axe is changed with the scroll wheel. Using the axe increases wireframe complexity and somewhat increases CPU cost per voice, so if the paths do not need to be dynamic, use a deformer instead. |
||||||||||||||||||||||||||||||||||||||||||||||||||||||||
Manipulating Curves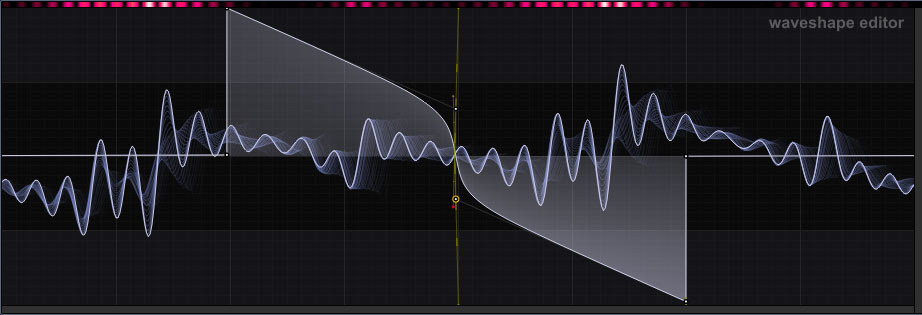
It's very easy to adjust the curve sharpness of a vertex: hover over the white curve line and drag up or down. You may do the same thing without hovering the curve by holding the command key (ctrl on Windows, ⌘ on OS X) and dragging on the curve. |
||||||||||||||||||||||||||||||||||||||||||||||||||||||||
Editing Shortcuts Some of these shortcuts apply to only the focused editor (the one currently with a blue outline). You can focus
an editor by performing a mouse operation (selecting, adding vert) or by middle-clicking.
|
Vertex Operations |
DeleteDelete vertices by selecting them and hitting the del or backspace key. The delete action deletes the currently selected vertices. If the vertices are children of a vertex cube, it deletes the cube as well, along with the rest of the cube's child vertices. A vertex may be the child of at most two cubes (say, if a cube was chopped, the verts in the middle belong to both new halves), and deleting the vertex will delete only the first cube it was 'adopted' by. |
ChopThe axe chop operation cuts a vertex cube into two at the point of action. A vertex cube can be chopped across any morphing range. For instance, to chop a cube along the key scale, you must first select key as the x-axis. This will bring up the visualization of the cube's as it spans the key scale range, which you can then chop. |
ExtrudeThis action creates a new vertex cube by extending the cube of the selected vertex, shifting the near side slightly toward the mouse cursor. Extrude by selecting a vertex in any 3D editor and hit the e key. Alternatively you can select Edit > Extrude Selected. The purpose is much the same as the chop operation, but the action is a bit more suited to following a pattern of a sample, for example. |
Sound Design Workflow |
General Experimentation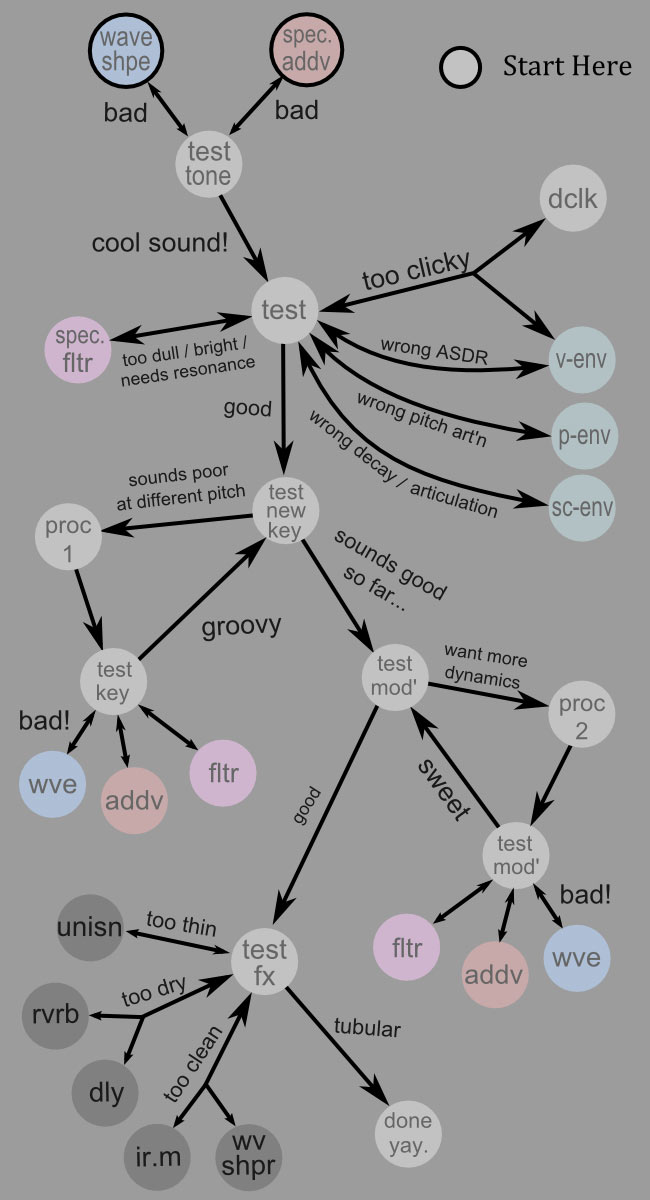
Process 1:
Process 2:
|