Curve Morphing |
Overview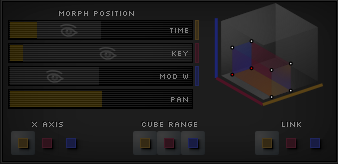
One of the most important features in Cycle is the concept of morphing. Wave-shapes, spectral curves, and envelopes have the ability to morph - meaning their shape can transform as a modulation source changes, like the mod wheel, or time. The basic mechanism of morphing is the variable weighting of several stored positions to make a curve node. The weighting can be modified as a parameter, allowing each node to transform from one configuration to the next, and hence make the whole curve morph into different shapes. There are several such parameters that can change the weighting - voice time, key scale, note velocity, mod wheel position, and so on, as well as most Midi CCs via the Mod Matrix. On the UI, these parameters are sliders, controls that show the visualization of the sound at different values of these ranges. In real-time audio processing, the values are determined by the actual voice time, note pitch, and mod wheel value (or another mapped input value). |
Morphing DomainsThese are the areas in Cycle where curve-morphing is possible:
Everywhere else that there are vertices and curves, curve node and vertex are interchangeable terms. But in these morphing domains, curve nodes are not quite the same thing as vertices. A vertex is the fundamental structural element that won't move unless you drag it with the mouse, whereas curve-nodes - which are the weighting of several vertices - will move about when the morph position changes. |
How to Use
|
Morph Position & Ranges |
Morph Position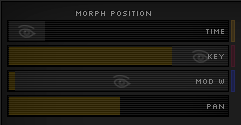
So again, there are three dimensions along which curves can transform: time, key scale, and modulation. We call these morphing ranges. (Note that the pan slider is just a visual positioner, not a morphing range.) The point in the morphing space that is visualized is set by the three sliders in the Morph Panel. Graphically, the visualizations in the waveshape editor and spectrum are of the sound at the slider's position along each of those ranges. Likewise, the graphics in the waveform surface and spectrogram are of the sound at two of these positions, showing the third range as their x-axis. The three current values of the morphing ranges make up what is called the morph position. |
Graphic vs AudioThere is a graphic morph position - set by the sliders for showing the visualized sound at any point in the morphing space, and there is an audio morph position for calculating the actual output sound. Here's how the values get calculated on the audio side: For the time range, the current value is the duration that the note has been held, as a fraction of the total preset duration. For key scale, the current value is where the note is as a fraction of the keyboard range. So a note at middle C would have a key scale value of about 0.5. The current modulation value is set by the mod wheel, or whatever modulation source you've chosen. |
View Depth & Cube Range
The cube range buttons are part of the morph panel. They are colour coded to the morph position sliders of time, key scale, and modulation. On those sliders there is a grey region starting from the right of the slider's main position with an eye icon at the centre. This is the view depth along that morphing range. When the cube range button is toggled on for a morphing range (e.g. the yellow button for time), then when new vertex cubes are created, their depth along that range is this view depth. Usage
|
Morphing Axis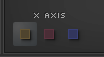
The x-axis of the Waveform Surface and Spectrogram Editor is time, by default. And so the curve node paths and visualizations over time are what you usually see. 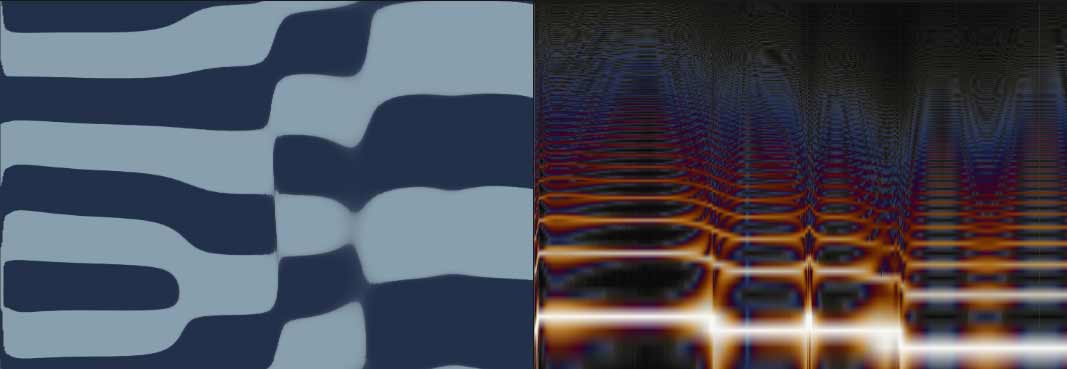
To see and edit how the waveshape / spectrum / envelope and their curve wireframes varies with respect to frequency, at a particular time, one may change the dimension of the x-axis to key scale. 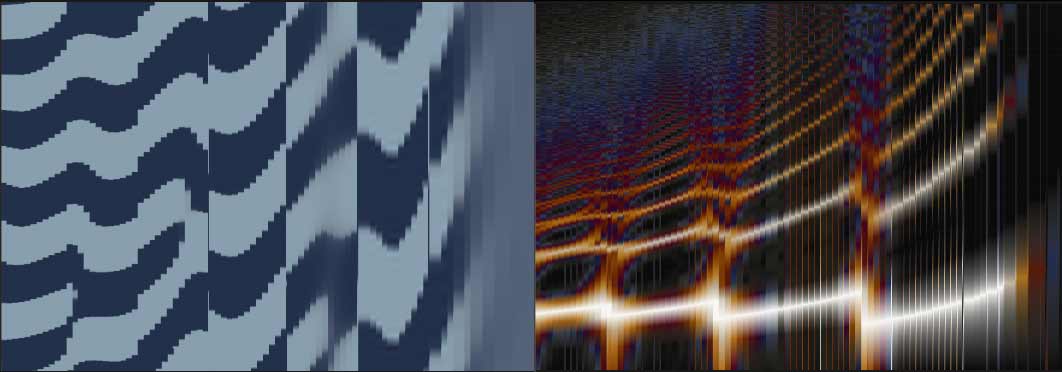
Similarly one may change the axis to mod to show the variation along the modulation range, at the particular time and frequency set respectively by the time slider and the key scale slider of the morph position. 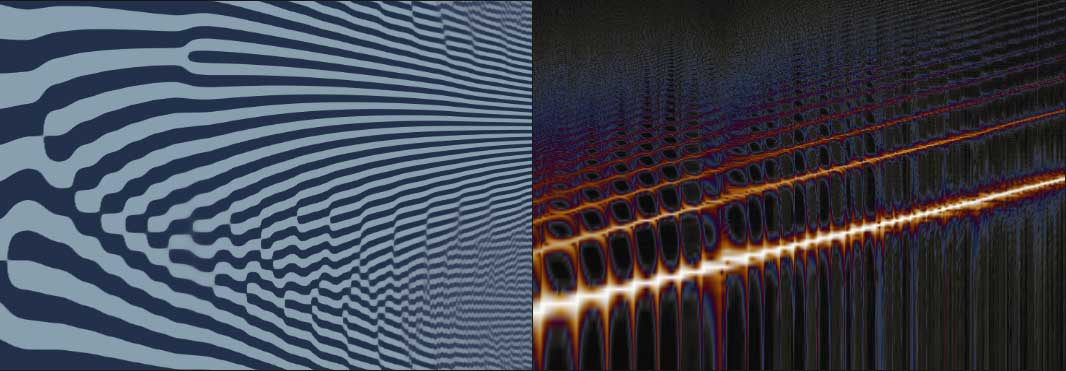
The Envelope panel shows the 2D envelope when time is the primary dimension, but otherwise shows the 3D editor. |
Simple ExampleLet's look at a basic scenario where curve morphing is applicable... |
Step 1.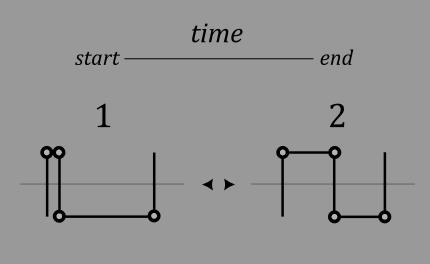
Imagine the waveshape of a pulse-width modulation sound, where the pulse width expands and contracts. Each of the nodes in the curve has two states to be in (basically a state is a node's x- and y-position, plus a sharpness value which tells the interpolation function how 'sharply' to bend around the node). |
Step 2.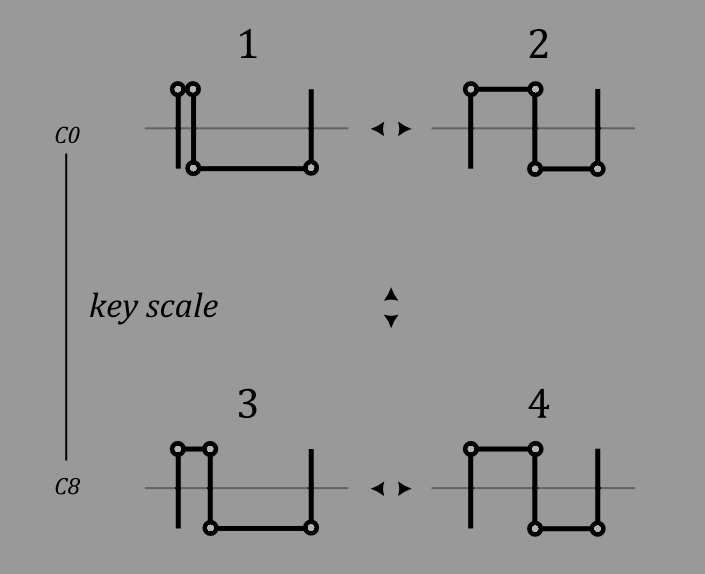
Suppose that we decide this sounds too thin in the higher notes. To fix this, we want to change the wave-shape so that in the high end of the key scale, the starting pulse width is wider. But to accomodate that, we need four states of the waveshape: two at the bottom of the key scale and two at the top. So now the sound is better adjusted across the keyboard. |
Step 3.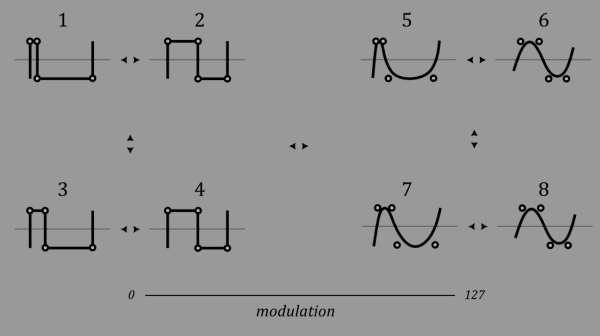
But! Cycle wasn't designed just to make a single type of tone in one preset. The way it stands, the preset sound wouldn't have any range in tonality like musical instruments have. We might want to control the brightness of the sound in this example. To reduce high frequency content in the waveshape we would decrease the sharpness value for each vertex and separate the closest points from each other. Because we still want to keep the ability to morph with Time and Key scale, we need another four states. |
Vertex Cubes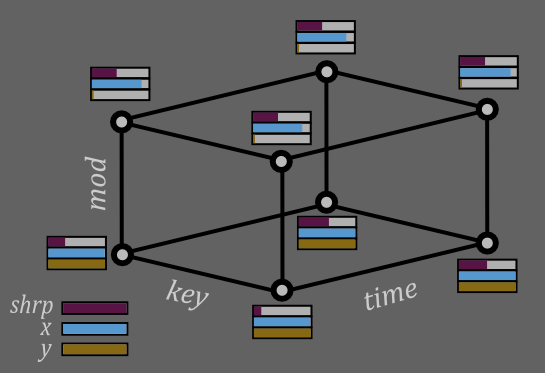
In total, the three morphing ranges form a network of eight states arranged like the corners of a cube. This is called a vertex cube, and one of these structures corresponds to each point in a (morphable) curve. Each time a curve node is created in one of the domains that support morphing (wave-shapes, spectrum curves, and envelopes), a vertex cube is created automatically. Similarly, when a vertex is deleted, the parent cube is also deleted along with the rest of that cube's remaining child vertices. If there are no nodes on the curve you are creating, the 8 states get initialized to the position you clicked at. However if there are nodes to the left or right, the states are initialized by averaging the two vertex cubes from the nodes immediately left and right of the new node. In this way it avoids making paths that would collide with the other two node's paths. |
Vertex Cube Visualization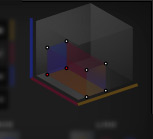
To the right of the Morph Panel is a graphic of the last selected vertex cube. Note the axes are shown by their colour. This doesn't display multiple cubes so select just one if you want to see where it sits in the morphing space. This graphic also shows the selected vertices of the cube in red. If linking is enabled for any range then several of the 8 vertex states will be shown selected. |
Linking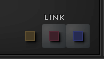
The linking buttons on the Morph panel allow you to set which of the 8 states get moved in unison when you move a curve node. By default, when all three of these buttons are toggled on, all eight states get moved together. If then you were to turn off the time linking (yellow), then you would be able to move the four 'low' time vertices independently of the four 'high' vertices. Which half gets moved depends on the morph position - whichever is closest. Likewise if you were to link time again and turn off the key scale linking, then you would be able to move the four 'low' key scale vertices independently of the high ones. And if you were to turn off all three linking buttons, just the corner of the vertex cube that is nearest to the morph position would be changed when you moved a curve node. So in general, enable the link button if want to move vertices along that morphing range in unison, and disable the button if you would like to move them independently. |
Cube To Vertex Path / Node
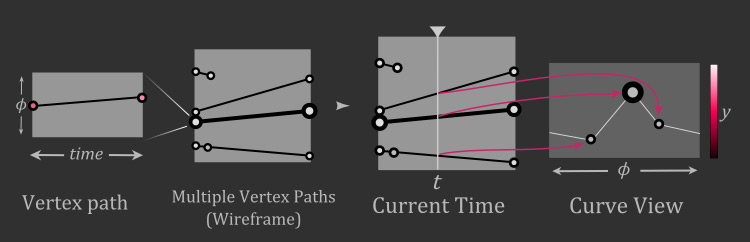
This is how a vertex cube becomes a vertex path. First, weight the opposite key scale sides of the cube according to the current key value, then weight the opposite mod sides according to the current mod value, producing a two-point path. These are the paths visualized in the waveform surface and spectrogram editors when time is the selected morphing axis. The final point that ultimately forms a node of a curve is the weighting of the ends of this path according to the current time. So each of the nodes that make a curve are a weighted combination of the 8 vertex states, and the weighting is determined by the morph position. When the position is closer to one vertex at any corner, that vertex gets weighted more, and the ones further away get weighted less. When the morph position moves, this in turn changes the weighting of the nodes that make up the curve, making it transform. |